
Have you ever stared at a puddle in your yard that just won’t go away and wondered why the water keeps hanging around? Chances are the ground beneath that puddle isn’t shaped to guide water where it should go. Land grading is the simple-but surprisingly powerful-practice of sculpting soil so it slopes the right way. When you get the grade right, rainwater moves off your property instead of turning your lawn into a swamp or seeping into your basement.
Defining Land Grading
Land grading is the process of reshaping the surface of the ground to create a gentle, intentional slope. You (or a professional grading contractor) remove high spots, fill low spots, and compact the soil so water flows away from structures. Grading is the first step of site preparation for any project that adds hardscaping, a garden, or even a new driveway. It’s like laying the foundation for everything else you plan to build or grow.
Visit https://www.epa.gov/system/files/documents/2021-11/bmp-land-grading.pdf to know more.
Because grading adjusts the natural contours of your property, it also helps with soil erosion control. A properly graded yard slows runoff, keeping nutrient-rich topsoil in place instead of washing it into the storm drain. That’s good for your plants-and for local waterways that would otherwise receive extra sediment.
How Grading Prevents Water Damage
Picture a heavy downpour. If your yard is flat or slopes toward your house, water pools around the foundation, creeps into crawlspaces, and can even push its way through basement walls. Over time, that moisture feeds mold, warps framing lumber, and weakens concrete.
By contrast, a yard graded with a 2-percent slope (about a quarter-inch drop per foot) directs stormwater away from buildings and toward safe zones-swales, rain gardens, or the street gutter. Pair that slope with yard drainage solutions such as French drains or dry wells, and you create a complete system that shields siding, patios, and footings from rot or heaving frost.
When Do You Need Grading?
You don’t have to wait for a flooded basement to act. Here are common red flags that tell you it’s time to re-grade:
- Standing water lingers for more than 24 hours after rain.
- Soil line touches siding or covers brick veneer weep holes.
- Mulch or gravel washes down walkways.
- Lawn feels spongy even during dry spells.
- Cracks appear in foundation walls where water collects.
You can check this site for additional information.
Protecting Foundations Through Slope
Your foundation is only as strong as the ground beneath it. Even a small grading error can funnel gallons of water toward the footing every time it rains. Over the years, that moisture expands and contracts with seasonal freezes, stressing concrete and mortar joints.
To protect your home, aim for at least six inches of fall within the first ten feet away from the foundation walls. You can measure this with a simple string level and a tape measure. If the drop is less than six inches, scrape away excess soil near the house and move it outward, or bring in fill dirt to build up low areas farther out. Don’t forget to compact each layer; loose soil settles, erasing your hard work.
Homeowners in clay-rich regions—like those familiar with leveling grading lebanon—should be especially vigilant. Clay holds water longer, increasing pressure against basement walls. A sound slope keeps that pressure from ever building up and extends the life of your home’s structure.
Step-by-Step Grading Process
Ready to roll up your sleeves? Follow this straightforward plan:
- Map the Highs and Lows
Walk the yard after a heavy rain. Mark puddles and soggy spots with flags or spray paint. This boots-on-the-ground survey shows exactly where to remove or add soil. - Set Reference Stakes
Drive wooden stakes near the foundation and farther out at the edge of the work area. Stretch mason’s line between stakes and level it. Measure down from the line to the soil to check the existing slope. - Remove Obstacles
Pull out shrubs, roots, and debris. If large tree roots are present, consult an arborist before cutting-those roots may be structural. - Add or Remove Soil
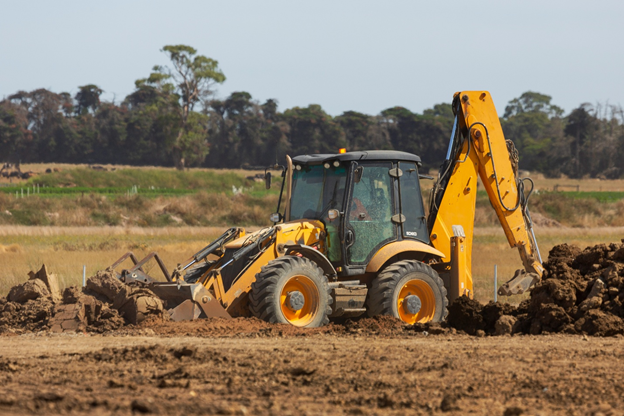
Using a shovel, skid-steer, or rented mini-excavator-common tools in construction excavation-scrape down high spots and dump soil into low spots. For big projects, screened fill dirt is worth the cost because it compacts evenly. - Rough Grade
Spread soil with a landscape rake, creating your 2-percent slope. Keep the soil at least six inches below siding to prevent splash-back and insect pathways. - Compact in Layers
Whether you’re applying two inches or two feet of fill, compact every six-inch lift with a hand tamper or plate compactor. Skipping this step leads to future settling and reverse slopes. - Fine Grade and Seed
Switch to topsoil for the final two inches. Rake it smooth, breaking up clods, then seed or lay sod quickly to keep wind and rain from undoing your work. This is known as finish grading. - Check Your Work
Run a garden hose at low flow near the house. Water should trickle away along the path you created. Adjust any spots where water sits.
Taking it slowly ensures accuracy, but if you feel in over your head, a grading contractor with laser levels and skid steers can finish most residential yards in a day.
With the grade dialed in, you can move on to patios, gardens, and that dream shed, knowing the ground beneath everything is set to protect your home. A little earth-moving today saves you from big repairs tomorrow-and keeps those pesky puddles from becoming permanent backyard features. For extra peace of mind, walk the yard after the next heavy rain and watch how quickly the water clears out; it’s a real-time check that your new slope is doing its job. You’ll also see healthier turf because roots aren’t suffocating, and you may reclaim corners of the yard you once wrote off as unusable.
Remember, land grading isn’t a one-and-done task-settling happens-so give your landscape a quick inspection every couple of years and touch up low spots with a rake and a few bags of topsoil. By staying proactive, you stretch the life of your foundation, safeguard your landscaping investment, and ensure every future project starts on solid, well-drained ground.